Thursday, February 5, 2015

Weapons And Equipment O.S.P. (Original Sewing Project)

So I had this cool Metal Gear-themed messenger bag from Fangamer, and that's all good, but the bag was a little straight up-and-down as it was.


But I also had some old t-shirts I didn't care about wearing anymore, even one that was a special swag shirt from PAX Prime 12, so I figured this could be a cool way to dress up the bag, and do a little experimenting with the sewing machine Molly gave me for Christmas. I asked my stepmom for advice and she recommended SF 101 fusible web to help lock all the stuff in place. She's way more talented than me at this and you should probably pay her to make you some stuff.


I cut the designs off the shirts and ran them through the machine where I could, and hand-sewed where I couldn't. I threw the badges back and and there you go! It's taken me most of the night, but I'm learning a lot and now the bag kicks so much more ass!


Doesn't Raiden look awesome? And look at Rex tryin' to be all sneaky on the back. Snake knows what's up!

What I'm Playing:
  • Main Campaign: Saints Row IV, Diablo 3
  • Side Quest: Hearthstone, Desert Golf


Wednesday, November 12, 2014

His Brother's Keeper - Crafting a Diablo Crusader Shield

Blizzcon is over, and with Blizzcon comes amazing cosplay. This year, I wanted to be the Crusader from the concept art for Diablo 3: Reaper of Souls. Unfortunately, I didn't get the armor fitted properly in time, so I couldn't wear full gear. I did, however, still get to walk in my favorite pieces: the shield, which I call His Brother's Keeper, and the double-headed flail, which I call Great Vengeance and Furious Anger.

My greatest mistake this year was in succumbing to the pressure to be competitive. I found myself struggling to finish pieces that I wasn't completely satisfied with the quality, and that were untested before I discovered they didn't actually fit me. It should be obvious, but the work that I wasn't enjoying also didn't turn out as well as things I had fun with. Parts of the costume were a chore, and they suffered. My great successes were in the shield and the flail, which had their challenges, but I loved making them and I love the results. These are the lessons to carry forward.

Please enjoy a gratuitous amount of photographs of the shield build, and a few of the flail as well, with a few comments by me...


The shield main body after being palm-sanded and heat-knifed from a 72x48x6-inch block of pink foam. Those frustrated gouges from the heat knife would eventually become cool battle damage. 


I figured a huge shield that spends a lot of time with its tip in the dirt could use a replaceable leather shoe for protection. I made this by templating the shield's tip with aluminum foil and duct tape, and transferring that to EVA. I then hand-stitched the two pieces with upholstery piping and reënforced it with hot glue.


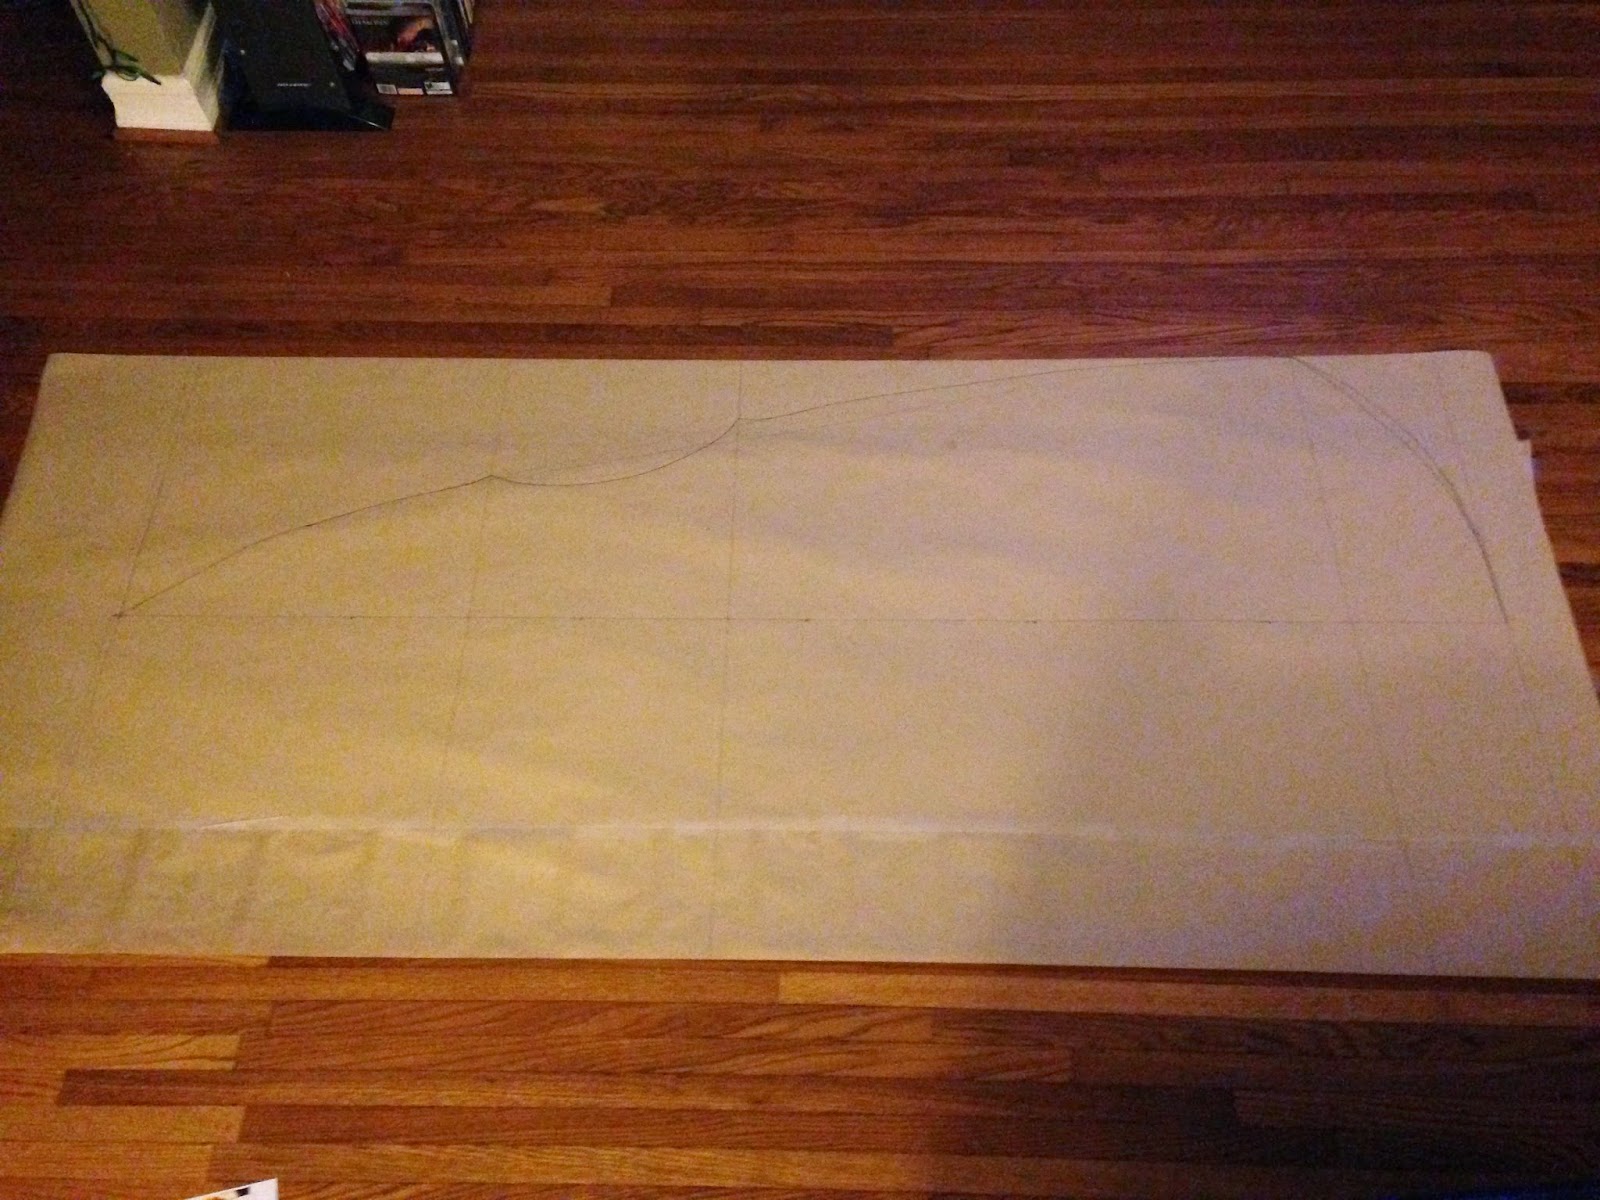
I made a lot more templates for this costume, like this paper template for the frontispiece. When in doubt, I would start measuring things and seeing how elements in the art compared to each other, and then I would usually find the solution.


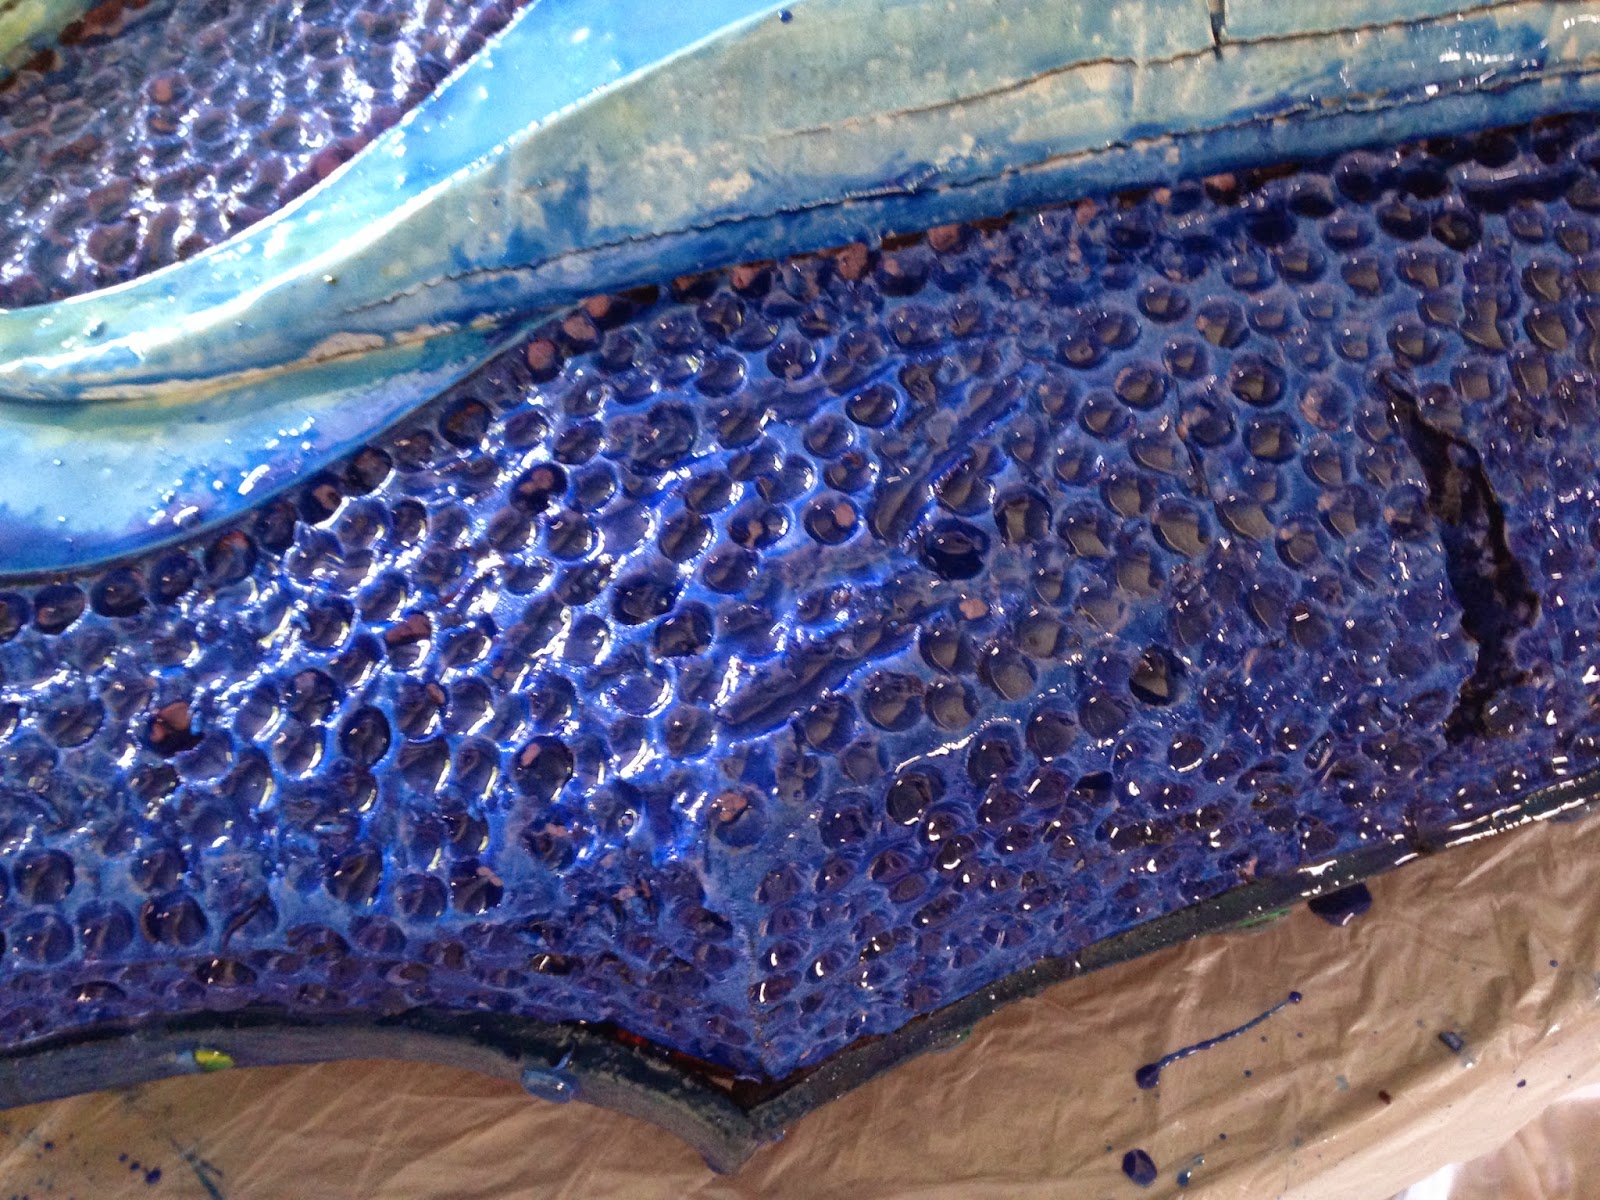
Here's the kite with the shoe and a 2mm craft foam overlay. The divots are meant to simulate a hammered effect on the bronze. The hammering is a bit aggressive, but it was done with a Dremel tool and a 1/2-inch grindstone, individually, by hand.


The typical way I've seen to give support to costume shields id to have a strong layer sandwiched between layers of foam. Since my shield is carved from a single block of foam, this wasn't an option. So I drilled 1.5-inch holes down through the body of the kite and installed to pieces of PVC piping, cut to fit flush to the shield's surface. The PVC was slathered generously with epoxy to make it stick.


The pipe then served as a mount point for bolts and washers, which were held rigid with expandable foam. As far as I can tell, I haven't seen this method before, and it worked fabulously. I flung this shield around my arm all day and noticed not the slightest amount of tearing around these mounts. If it's appropriate for your project, give it a try.


The bolts let me mount this martial arts foam bracer, which acted as my arm band. This eventually was too weak to hold the final weight of the shield, but I thought it was pretty smart at the time.


Here's my crude flail handle: PVC cap, corner molding, wood dowel, a banister topper, wood glue, epoxy, a screw, and a large ring bolt, all from Home Depot.


The cuff wasn't enough to make the shield wearable, so I installed a PVC handle using the same method as before. Easy peasy.


The shield at its current weight of 6 pounds was quite comfortable. This would change in time...


This small belt sander was a boon for shaping the cross frontispiece, made from four layers of EVA that I stacked and sculpted (not unlike myself -_^ )


Rough mockup of the assembled shield for heat-knife battle damaging. I wanted to have the pieces together so that gashes that hit the kite and the cross would match up. At this point I still thought I was going to paint each piece separately. Nope...


Two pieces epoxied together, after a coat of Plastidip that I didn't like.


After a coat of Epsilon plastic coating. The divots on the kite ate up a lot of the Epsilon, so I wound up with not quite enough in the bottle for two full coats all over. I gave it what I could.


Primer white spray.


Here's the flattened craft foam applique that would go on the flail heads. I came up with the design by joining images from Tyrael's sword, with a bolt of energy striking an image of Diablo, and that energy is passing through the bodies of the Crusaders. I wanted to give the basic iron flail a little flash and I think this turned out great.


Bronze spray paint with a dry-brushing of copper.


Great Vengeance and Furious Anger


I used a craft burning tool to take this image from the Book of Tyrael and put it on leather. This leather would be my handle-wrap for the flail.


Here's the wood-tone paint job on the back of the shield. There are loads of tutorials on YouTube for painting a faux wood look to your needs. I feel this paint job was a huge step up from the Training Dummy armor.


Remember those big, nasty gashes? I imagined those as the result of some big, flaming claws or blades or something horrible, and I turned them into fire damage. Rough brushing and buffing of some grey and black craft paint, making sure to get deep in the cracks.


With this giant piece of wood, why not a little carving to remind you of your sweetie back home? For this I Dremelled through the paint job with an etching bit, then painted over in a light tan and towelled off the excess. Töbayaz + Molly.


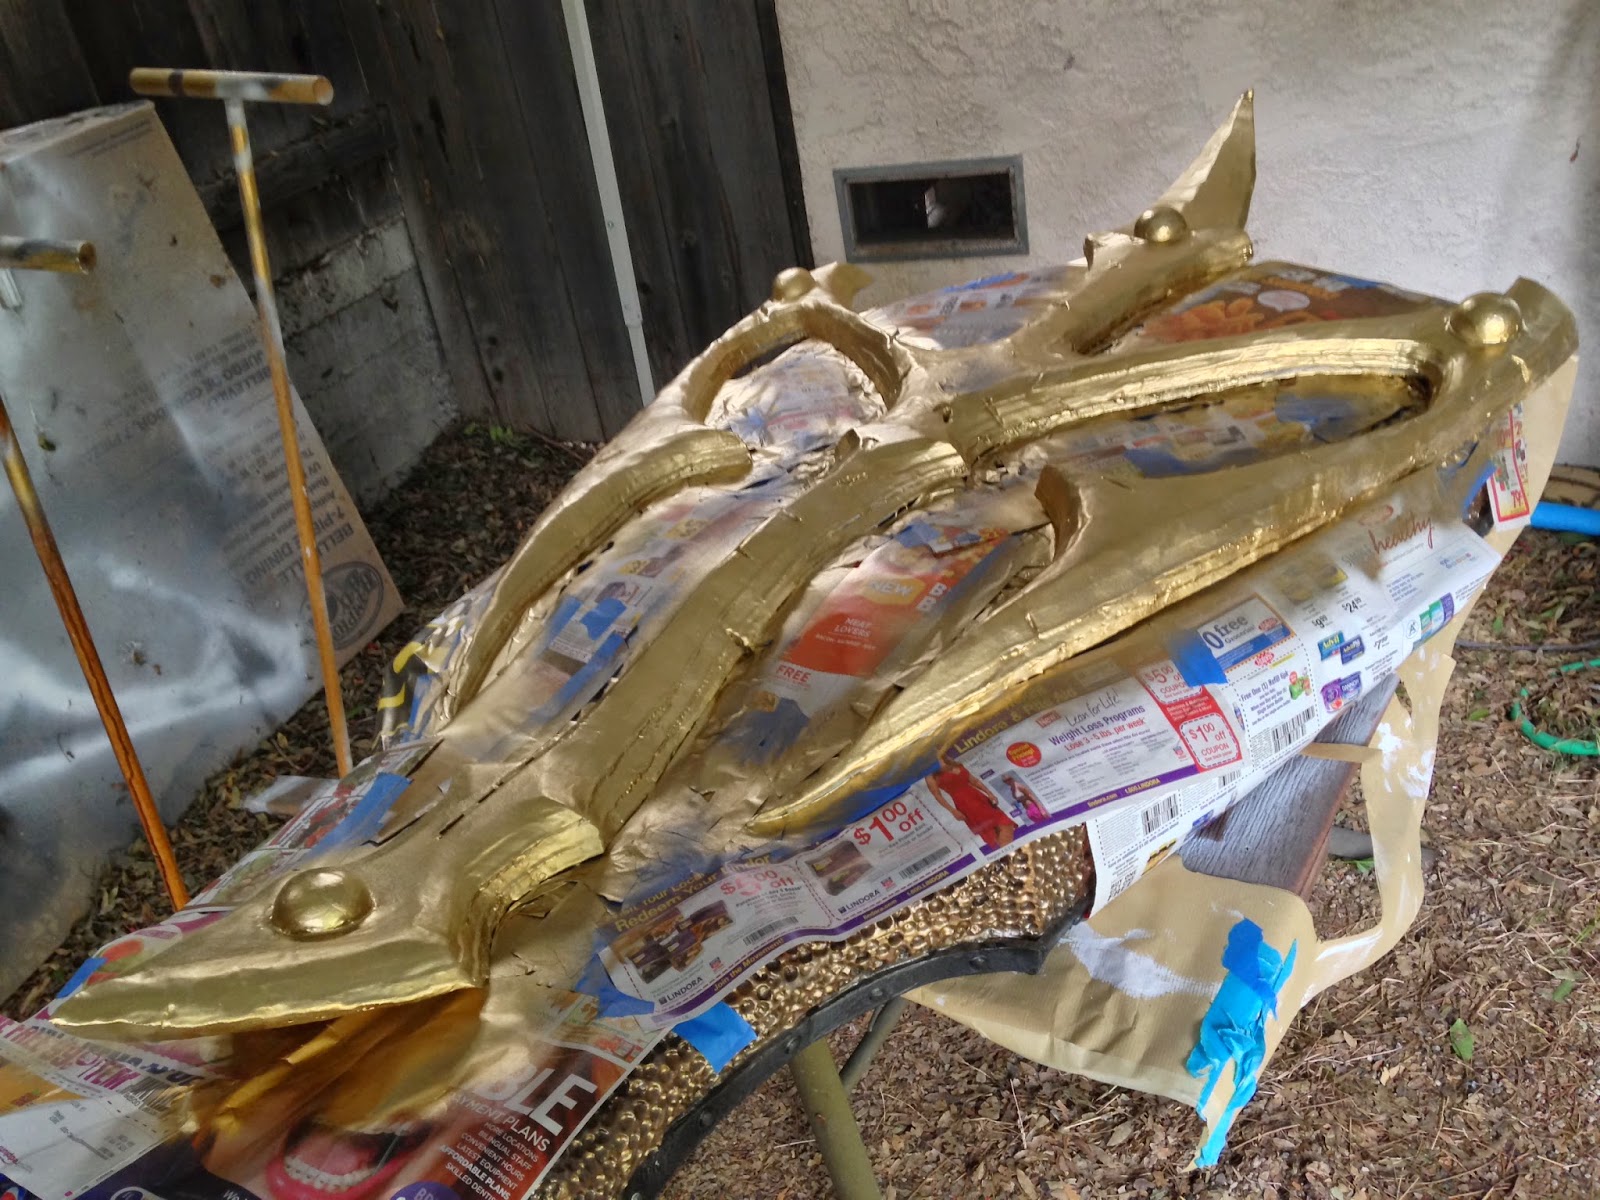
Gold spray on the cross. Easy job, but the masking is tricky.


Back to the other side to paint the iron supports. I used a hammered iron spray paint and dry brushed a little grey over the rivets.


Back to the other side, getting ready to paint the shoe.


Full paint, with a faux leather finish on the shoe. The faux leather technique is pretty fun: basically lay down a light color glaze, then layer on on eor two darker glazes, and while that dark color is on you mash crumpled-then-uncrumpled sheets of plastic wrap on it to get the wrinkles.


Full paint on the back.


My gem turned out pretty rough in the front, but here's the acrylic rods that I set while it was forming. This gave the gem a secure post to socket it into the shield's face.


By now, the shield was too heavy for the martial arts cuff to be useful, so I switched to these leather tool belts. I trimmed them, and they mounted beautifully to the shield. With a little darker paint to match, and an EVA cuff for support, the held the weight of the shield. Really, I'm pretty impressed with how tough the whole rig is.


A couple with the gem in place, Queen-size hotel bed for comparison.


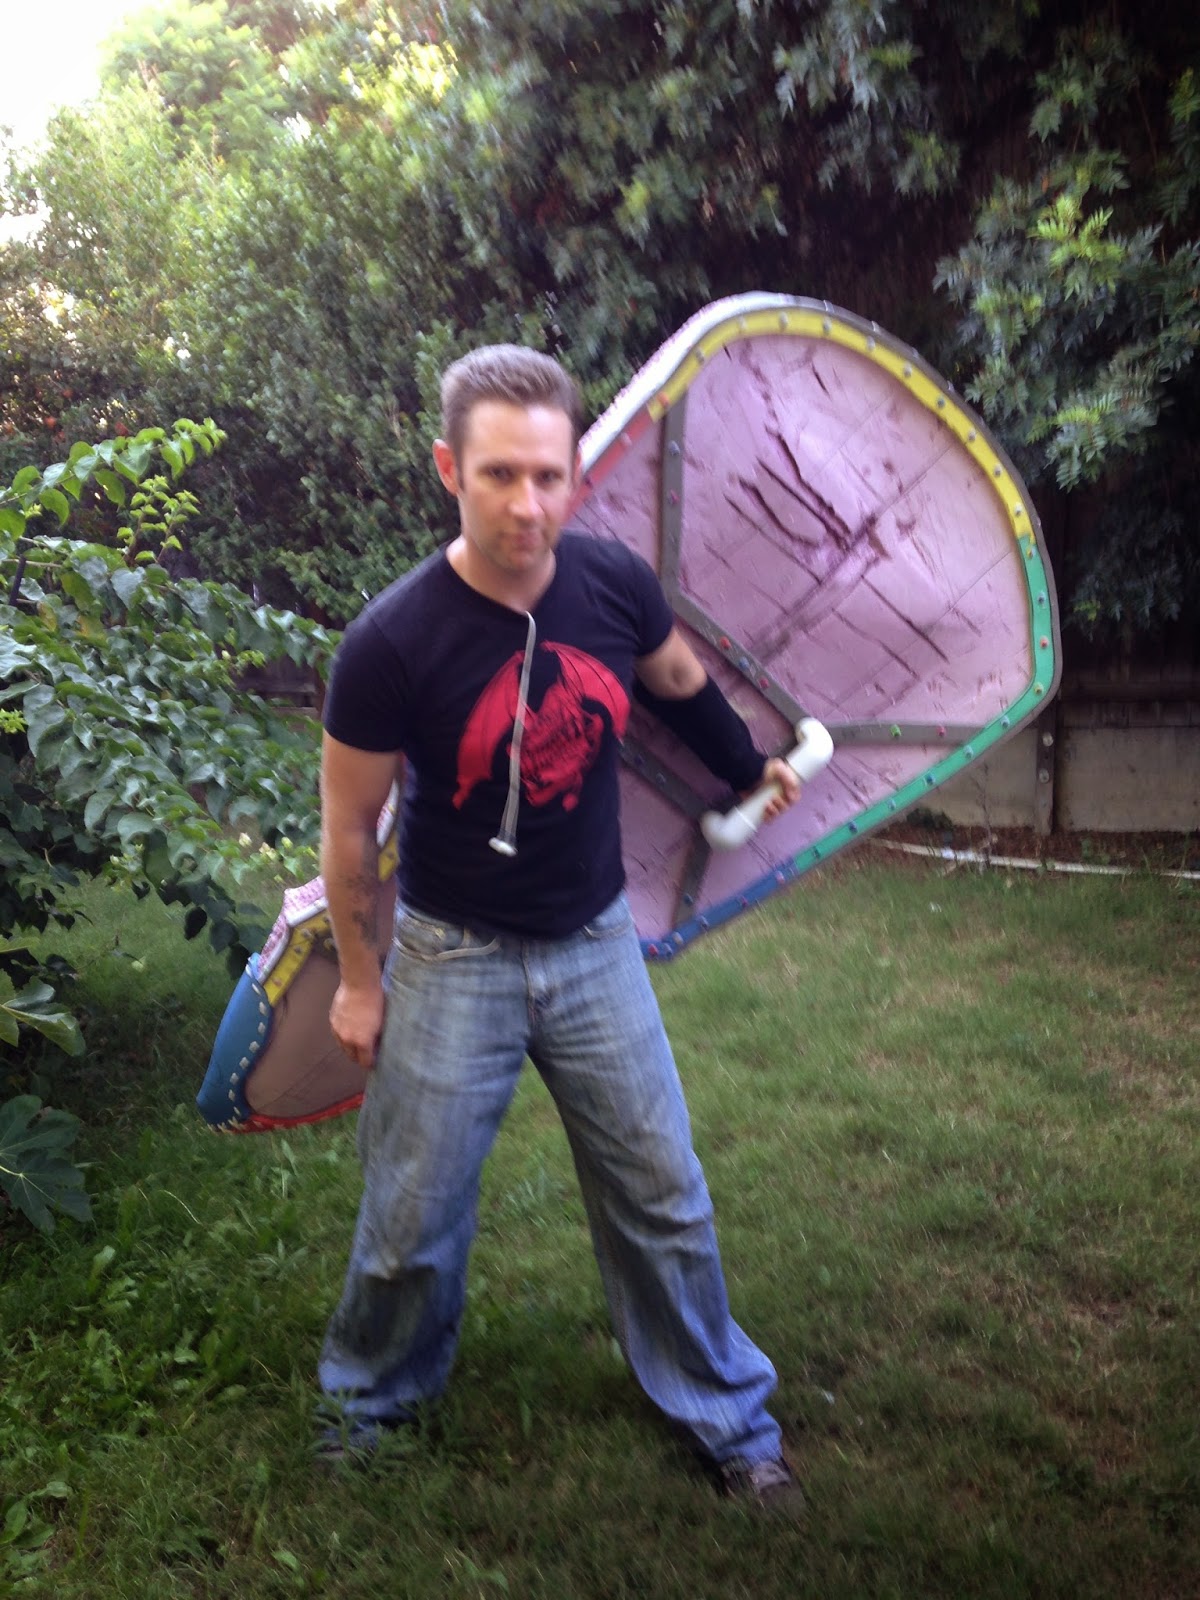
Finally, a couple costume selfies! Here I'm wearing a modified costume out of the pieces that worked, basically so that I can show off this beautiful shield and flail.

I really did love making this shield. Turns out at around 12-15 pounds, it's a bitch to carry. Even if I had made a working set of armor, I doubt I could have held it all together all day. I probably won't revisit this costume without major modifications, but I take satisfaction in knowing that I built what I wanted, and in some ways it was even better than I had imagined.

What I'm Playing:
  • Main Campaign: Diablo 3, Hearthstone
  • Side Quest: Steamworld Dig, The Binding of Isaac


Monday, September 15, 2014

Still Playing With Power

For my last birthday my Pop sent me an Amazon gift card. Because I insist on spending all forms of gift money on toys and fun stuff, I got me a Supaboy! Deep down I kind of want to be playing SNES all the time, and now I can!


The Hyperkin Supaboy is an aftermarket portable console that plays SNES and Super Famicom cartridges. The beauty that happened after hardware patents for machines like the NES, SNES, and Sega Genesis expired is that now anybody can reverse engineer the hardware and duplicate it, thus, tiny versions of your childhood favorites.

First of all, I think the packaging on this thing is awesome; They're smart to immediately bring on the nostalgia for the old SNES packaging font and red-and-black motif. More importantly, the feel of this thing is pretty solid. The buttons and D-pad are firm and responsive, and the screen is bright and clear. I noticed that the game booted right up, while my vintage SNES sometimes needs a few tries, so apparently that thing may be on the way out. As a quibble, I would have liked if the included rechargeable battery came installed, so you're going to need a small Phillips screwdriver as soon as this comes out of the box. There's also a little bit of rattle in the cartridge slot, but no big deal. What is big is the overall size: this thing is clearly made for adult, nostalgic hands, not small children, but kids should be able to play just fine with a controller plugged in.

All in all I think the Supaboy is pretty awesome and I'm glad I picked it up. Thanks, Pop!

What I'm Playing:


  • Main Campaign: The Legend of the Mystical Ninja
  • Side Quest: Star Fox, U.N. Squadron

Friday, September 12, 2014

Epsilon Application

I've been working on a Diablo 3 Crusader costume for the upcoming BlizzCon, and today marked a big day for the build: I managed to get a layer of Epsilon coating onto the front side of my shield. Since this was my first time working with the material, I thought I'd share a few notes and pictures.


What you see above is a shield made of pink insulation foam and an EVA foam cross, which I've covered with Epsilon that was tinted blue for visibility. It took a couple hours to put on, and I worked in sections starting with the entire cross and then going around the body of the shield. 

Epsilon is a two-part epoxy coating by Smooth-On made for foam projects. It contains no solvents, so it won't dissolve foam on application. The end result is a piece that's easy to sand and paint, and has a hard plastic shell that protects it from impact. It's available online, but I happened to pick mine up at the Reynolds Advanced Materials in North Hollywood. 

The stuff mixes easily, but you have to work fairly quickly as it will start to gum up after 10 to 15 minutes. At one point I think I was too hasty in mixing, and the material went through a very noticeable exothermic reaction and cured into a useless glob. 

My shield is covered with divots intentionally, and it was tough to determine exactly how much Epsilon I would need to cover the surface area, but this application took up all of a trial-size pack. My coating is a bit uneven, and I'm sure I didn't make most efficient use of the material, but I think I still got the end look that I wanted. Once this side cures to a non-tacky state over the next two hours, I'll flip it over and do the much smoother back side.

All in all I think Epsilon is a cool material and I look forward to testing the hardness of the finished piece. With the glue-like consistency, I also liked how well it smoothed over unsightly gaps in the construction. I've seen some other people cover their EVA armor in this stuff and then be disappointed at the lack of flex afterwards; for me, the rigidity is a feature, not a bug.

I'll keep you all posted either on my cosplay Facebook page as to the final result!

What I'm Playing:

  • Main Campaign: P.T., Rogue Legacy
  • Side Quest: Shovel Knight


Thursday, May 22, 2014

Blizzcon Costuming: It Begins Again

It seems that my Blizzcon cosplay choices essentially derive from whatever Triple A Cosplay dares me to do. At dinner following PAX Prime last year, Mario happened to show me the concept art for the Diablo 3 Crusader and his car door of a shield. I'd say it's more like a refrigerator door. I knew he would be my next big project.

I've started work on the Concept Crusader, starting with the shield. I feel like this is the biggest, hardest, most important piece to get right, and if it fails, I want it to fail before a lot of effort and resources are put in other areas. I'll be posting progress shots all the way up to November, and here comes the first, early batch!


It's tough to see, but this is the first drawing of the shield on brown paper. I looked at how many inches apart were some of the key details on the shield in the art, and scaled those measurements up to six feet by three feet. I drew out the left side first, then cut that and folded the paper over to ensure symmetry. Seeing the shield on this scale was daunting. I had been up late and was punchy, and I almost convinced myself that this whole thing is too big and I shouldn't bother. But then I remembered that everything on the Crusader is ridiculously oversized and that's why it's awesome. Feeling reäligned, I pressed on.


The paper shield template, with a yardstick for scale.


For ease of transfer to foam, I traced the paper template on coroplast. Cardboard would be just as good, this is just the material that I happened to have around and fit my needs for size. Utility knife for scale.


I traced the shape out onto EVA foam mats. I bought the colored ones because the black ones at Home Depot had a textured side that was too bumpy. Plus, these are more fun, right?


One layer trimmed.


Both layers trimmed. I'm also going to acquire a harder material to be the core, and these foam layers will be on the outside. I seriously considered not painting the final product. I'll be very happy knowing how colorful my shield is on the inside.


The finished shield has some interesting bends, so I built this frame to help me bend the foam. Nothing special, just pegs cut from a 3/4-inch dowel and hammered into a wooden cross. No religious significance intended. I decided I wanted a 6-inch thrust *ahem* on the highest and lowest points on the shield, and referred back to the shield's major features to determine where that should drop to a 2-inch thrust. The wings of the shield will fall on the outer arms of the cross, essentially giving them a 0-inch thrust. Hope it works...

What I've Been Playing:
  • Main Campaign: Diablo 3
  • Side Quest: Hearthstone