Showing posts with label Blizzard. Show all posts

Thursday, May 22, 2014

Blizzcon Costuming: It Begins Again

It seems that my Blizzcon cosplay choices essentially derive from whatever Triple A Cosplay dares me to do. At dinner following PAX Prime last year, Mario happened to show me the concept art for the Diablo 3 Crusader and his car door of a shield. I'd say it's more like a refrigerator door. I knew he would be my next big project.

I've started work on the Concept Crusader, starting with the shield. I feel like this is the biggest, hardest, most important piece to get right, and if it fails, I want it to fail before a lot of effort and resources are put in other areas. I'll be posting progress shots all the way up to November, and here comes the first, early batch!


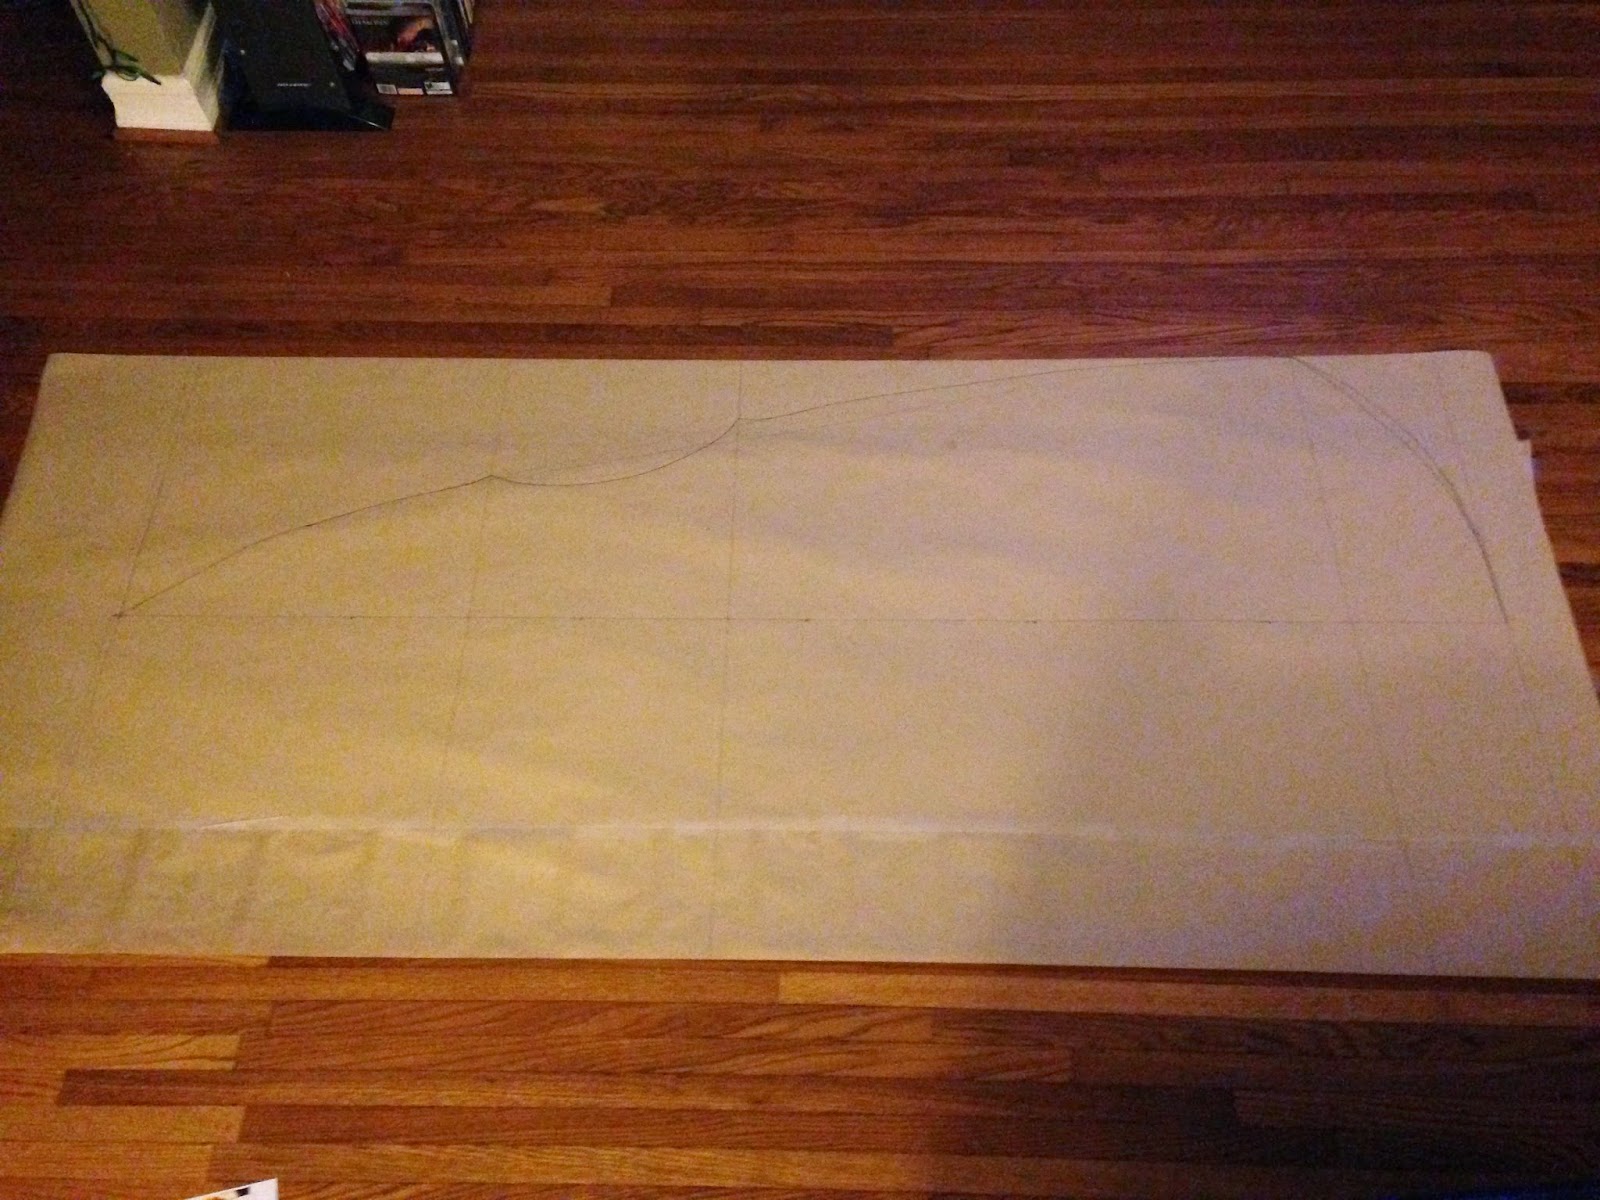
It's tough to see, but this is the first drawing of the shield on brown paper. I looked at how many inches apart were some of the key details on the shield in the art, and scaled those measurements up to six feet by three feet. I drew out the left side first, then cut that and folded the paper over to ensure symmetry. Seeing the shield on this scale was daunting. I had been up late and was punchy, and I almost convinced myself that this whole thing is too big and I shouldn't bother. But then I remembered that everything on the Crusader is ridiculously oversized and that's why it's awesome. Feeling reäligned, I pressed on.


The paper shield template, with a yardstick for scale.


For ease of transfer to foam, I traced the paper template on coroplast. Cardboard would be just as good, this is just the material that I happened to have around and fit my needs for size. Utility knife for scale.


I traced the shape out onto EVA foam mats. I bought the colored ones because the black ones at Home Depot had a textured side that was too bumpy. Plus, these are more fun, right?


One layer trimmed.


Both layers trimmed. I'm also going to acquire a harder material to be the core, and these foam layers will be on the outside. I seriously considered not painting the final product. I'll be very happy knowing how colorful my shield is on the inside.


The finished shield has some interesting bends, so I built this frame to help me bend the foam. Nothing special, just pegs cut from a 3/4-inch dowel and hammered into a wooden cross. No religious significance intended. I decided I wanted a 6-inch thrust *ahem* on the highest and lowest points on the shield, and referred back to the shield's major features to determine where that should drop to a 2-inch thrust. The wings of the shield will fall on the outer arms of the cross, essentially giving them a 0-inch thrust. Hope it works...

What I've Been Playing:
  • Main Campaign: Diablo 3
  • Side Quest: Hearthstone


Sunday, November 17, 2013

The Patient Warrior - Costuming the Training Dummy

Hi all! A week ago today I was in recovery from Blizzcon. I'm sure a lot of exciting things happened, but I could hardly tell because I was in costume. But that was pretty awesome on it's own, truth be told. I went as a Training Dummy, which in World of Warcraft is an inanimate combat partner for you to test yourself against in-game. The concept came up at a post-Blizzcon dinner a couple years ago and I immediately wanted to do it. So here's a few pictures and words to show what I got myself into...


Here is the Training Dummy in the game. It will wear a different colored banner depending which faction it belongs to, Alliance or Horde. My dummy wears a blue alliance banner since my friends and I play Horde. While this thing is built like a telephone pole, I wanted to be mobile, so the project quickly evolved into a sort of dummy-themed suit of armor.

An early resource I used was Bill Doran's N7 armor project, which uses EVA foam mats and transforms them into armor pieces from Mass Effect. The templates gave me a perspective on how big individual pieces needed to be, and how I should change the shaping for my purposes. This was my first time working with EVA, and while I made plenty of mistakes, I still learned a lot and quickly grew to love the material.


Here is an early heat-shaping test with the foam. The upper piece was shaped with a heat gun, which I found difficult to get an even spread on large pieces. I much preferred an oven, set to 250 degrees F for 5-10 minutes. The foam gets very pliable, and you can still shape it with your hands. When it cools, it gets very rigid, but you can still cut and even re-shape it. You have to use a piece smaller than your oven, because if the piece is too big it will trap all the heat and burn. The good thing is burnt EVA is still really easy to clean off an oven grate.


Turns out raccoons love EVA foam. Watch out if you leave stuff outside overnight.


Here are some shaped and glued arm pieces. I wanted to have ones that go all the way around, but I measured wrong. Instead of doing a new piece, I put in a spacer and covered up the gap with masking tape. Really slapdash work, but it held at least.


The Dremel sander really rips through this stuff, a bit more than needed. I had better results on edge work with a power sander. The Dremel is pretty awesome at making pokes and gashes that look like weapon damage.


Here are some pieces with their first coat of paint on a drying rack I made. The wood graining technique uses two colors of paint, a base and a darker detail. The detail coat goes on thick and wet, and you scrape bits of it away with paint combs and a rocker comb. I found these combs in Home Depot under the Martha Stewart line. I also found a really helpful tutorial.


The game dummy has a bit of broom stuck on his head, but I wanted a mowhawk. I took a broom and cut the straws off, then I poked holes in a strip of foam and stuffed the straws in like hair plugs. That all got locked down with hot glue. I lined the bottom with fleece, and that served as a structural member for my hood.


Here's a paint test where you can see the various effects of different combs and the rocker. The rocker takes some finesse to get used to, but it produces a great effect when you do it properly. Also, wood grain isn't perfect, so I remembered not to be too precious about how it looked. The amount of imperfection that served to improve this build was quite liberating. Here are some finished armor pieces...


Here is my sword progress. I used a 2-foot PVC pipe as the core, and surrounded it with pink insulation foam. Once the spray glue had everything together, I sat in the driveway with my sander and whittled out a sword. Again, where there were imperfections, I cut them out with a drywall saw and made it look like weapon damage.


Finished shield and breastplate, with silver paint. I thought the pentagonal shield on the model was boring, so I made mine to look like a section from a wine barrel. Wine barrels served as a major design touchstone on this build.


My shield handle: a metal gate handle from Home Depot. I stuck on perfectly with Gorilla Glue, and the screws even went into the foam to complete the detail.


This rope collar was stressful. I wrapped manilla rope around a cardboard shipping tube using a spiral hitch, then covered it with silicone sealant. When it's all together, the wrapping slips off and holds shape. You can even peel off layers if you made too much. I then sliced it lengthwise with a razor, and thankfully it still held. I mounted it to some elastic and Velcro and patched some of the holes with hot glue. This may have been my most rugged piece.


Here's a test wear of the burlap hood. Besides eye holes, some trimming is needed so I don't look like a BDSM kitty cat.


The banner cape, made by Tina, grommeted and held by some more rope work. I thought I would need Velcro to hold this in place, but it actually stayed in place very well.


Finished and painted hood. I used a plastic mask from Michael's to align the hood's eyeholes with my eyes.


Full armor test wear. This turned out to be critical, as areas where I had glued Velcro to paint quickly failed. After some re-gluing, things were better.


Things still weren't perfect, though. The Velcro on my pack piece failed at Blizzcon and I had to do emergency repair. I nixed the back armor since it was one of my worst pieces and nobody could see it anyway. I superglued my chest and torso together and held them up with scrap burlap, which I actually think looks better. The costume was a little easier now to sit in, but I couldn't bend over. But it held.


And here's the whole thing!


And here's one from Eurobeat Kasumi Photography. Thank you so much!


What I've Been Playing:
  • Main Campaign: Pokémon Y
  • Side Quest: Resogun, Contrast


Sunday, December 5, 2010

/love. You Love BlizzCon

I'm putting up today's post with the assumption that it's not too late to talk about BlizzCon. Just like it's never too late to start playing StarCraft or World of Warcraft, BlizzCon has remained topical in my circle of gamer friends months after the fact. Now with the glow of Cataclysm peaking over the horizon, it seems that 2010 has been an excellent year to be a fan of Blizzard.